

ORLANDO, Fla. -- As we continue to stay physically distant from others at school and work, the Weather Experts Spectrum News wanted to bring you some fun at-home science experiments you can do with your families.
Each of our top five picks includes not only how to do the experiment, but a brief explanation of the science behind what is occurring.
Our hope is to bring you some fun, along with a little education about the weather. Enjoy!
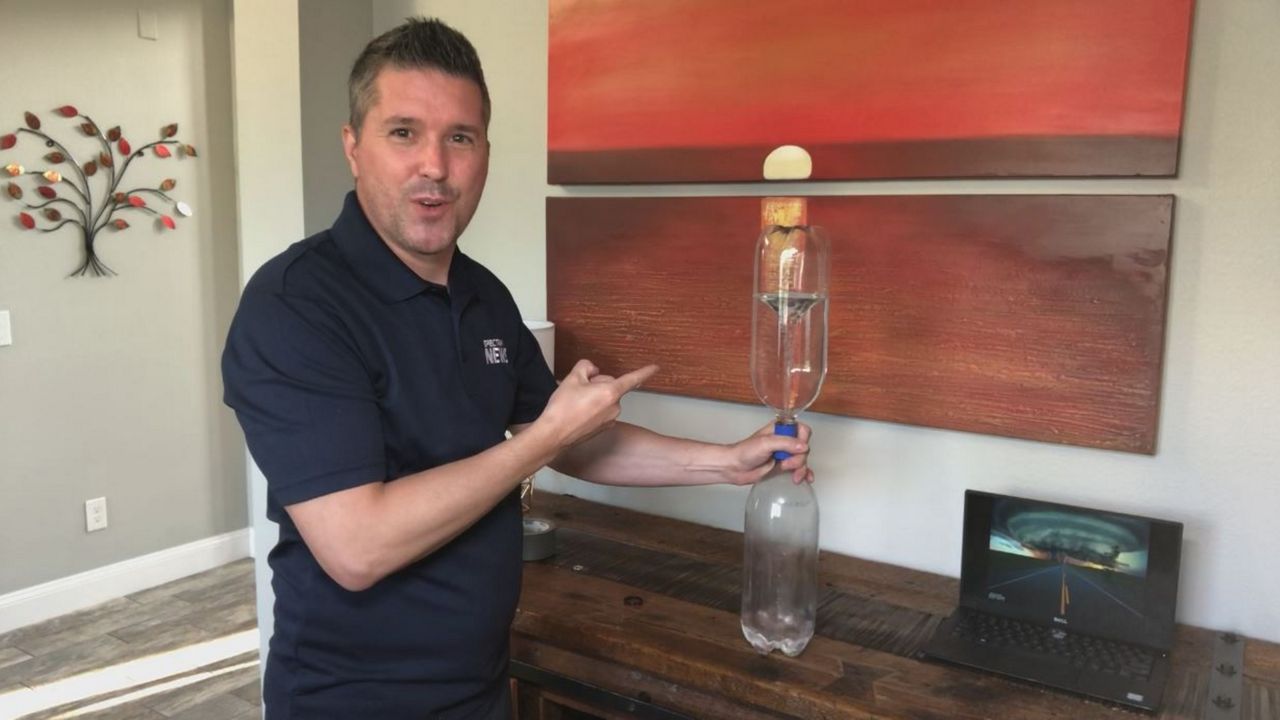
Tornado in a Bottle by Meteorologist Bryan Karrick
Have you ever watched the water drain from your kitchen sink or bathtub and noticed a spin, or something called a vortex? A vortex is a swirling motion that forms when liquids and gasses spiral around an empty center. This is similar to how a tornado forms, as liquids and gasses whip rapidly around the center of the circulation and tighten.
What you’ll need:
- Two empty soda bottles of the same size
- Twister tube (found in an online search)
A washer suitable for the bottle size you have and duct tape if you don’t have a twister tube
What to do:
- Fill one bottle about 2/3 full of water. Attach the twister tube and connect the second bottle to the other end of the tube, making sure they are secure.
- If you don’t have a twister tube, place the washer on the bottle with water in it. Align the opening of the empty bottle on top of the washer on the bottle with water, then wrap tightly with duct tape.
- Turn the bottle over quickly and start moving the twister tube in a circle. A tornado (vortex) will form as water spirals from the full bottle into the empty one.
- You can always put small objects, like Monopoly houses in the water so they spin.
- A hint of color? Have an adult pour 2 ounces of lamp oil in with the water. When you spin it, the oil will float on the water’s surface since oil is less dense than water. Swirling them together will give your tornado a bit of color.
For a tornado to develop, you need cool, dry air slamming into a warm, moist air mass. As they collide, instability develops, and we usually see thunderstorms. Add in something we call wind shear or a change in wind direction or wind speed as we walk up through the atmosphere and we may be able to create an invisible, horizontal spinning effect. As the air rises into the updraft of our thunderstorm, it tilts the rotating air from horizontal to vertical.
Voila, a tornado!
It may sound crazy for Florida, but why not make your own snow? This easy, at-home project is something you can do with your kids for fun or to start the discussion on how snow forms and why we don’t see it often in Florida.
What you’ll need:
- Shaving cream
- Baking soda
What to do:
- Mix one cup of shaving cream and one cup of baking soda together with a fork until it takes on a snow-like appearance. A few drops of water or more baking soda may be necessary. Once complete, you’ll be able to play with your ‘snow’ for about 7-10 days if left uncovered in an area that is not overly humid. This snow is not edible!
Snow forms when the temperature is at or below the freezing mark of 32 degrees. It must be this cold from the ground all the way to the sky. You also need an abundance of moisture. Much like rain, water evaporates and starts to rise. Rain forms as the water vapor condenses into a water droplet. Snow, however, changes straight into ice because of the freezing temperatures. Ice particles in the cloud collide and form larger snowflakes that once is heavy enough, will fall back to the ground.
Cloud in a Jar by Meteorologist Chris Gilson
You can easily make your own cloud at home with just a few things you can likely find in the kitchen.
What you’ll need:
- Glass jar
- Small strainer
- Water
- Ice
What to do:
- First, carefully pour hot water (without spilling on yourself or someone else -- best to ask a parent or an adult to help you with the water) into a glass jar. Make sure it is completely full.
- Then dump most of the water out except about an inch of water. Leave that amount of water in the bottom of the jar.
- Now, get a small strainer. Place the strainer over the open mouth of the glass jar.
- Next, place ice cubes on top of the strainer and watch a cloud begin to form.
This cloud appears because the warm air from the hot water in the jar rises. Warm air rises because it is less dense. This warm air meets the cold ice cubes at the top of the jar in the strainer. The ice cubes then cool the warmer, rising air. When the warm air meets the cool air, a process known as condensation occurs. This turns the water vapor (a gas), from the warm air that was rising, into a liquid.
The droplets then form what looks to be cloud.
My experiment will be creating a prism to reflect a rainbow. It’s a simple experiment that one can do with household items.
What you’ll need:
- Clear glass of water
- One white sheet of paper
- Sunlight
What to do:
- You fill the clear glass all the way to the top with water.
- Place the glass on a table near direct sunlight. The glass needs to sit about halfway off the table.
- Take the piece of white paper and place on the floor. Move the paper until a rainbow forms on the paper.
The glass of water creates a prism that separates the colors of visible light. The light moving through the glass creates the colors of the rainbow – red, orange, yellow, green, blue, indigo, and violet.
Solar Oven S'Mores by Meteorologist Maureen McCann
Here's a fun way to make use of our sunny, warm Central Florida weather by harnessing solar energy to power your own oven. Best of all, in this experiment we use the oven to bake S'mores.
Are you planning on ordering pizza this weekend? Be sure to save the box. It serves as the oven to cook S'mores.
What you’ll need:
- Adult supervision
- Pizza box
- Two clear sheet protectors
- Black construction paper
- Clear tape
- Blade
- Thermometer
- Barbecue skewer
- Glue stick
- Tin foil
- Ruler
- S’mores ingredients: graham crackers, marshmallows, chocolate bars
What to do:
- Measure a square 2" from each side of the top of the pizza box and mark with a pen. Cut out 3 sides of the square to create a flap.
- Measure and cut tin foil to line the bottom of the pizza box. Apply glue to the bottom of the box and place foil on top. Smooth it down.
- Measure and cut foil to line the inside of the flap. Apply glue and place foil with the shiny side up.
- Cut a piece of black construction paper that is smaller than the bottom of the pizza box. Tape it to the center of the bottom of the box with the clear tape. This will be the surface you cook the s'mores on.
- Separate the sheet protectors so they are one layer of plastic and tape them together.
- Tape the plastic as tight as possible to the inside of the top of the pizza box, covering where the flap was cut out.
- Poke small holes 2" apart along the side of the flap cutout on the top of the box. Don't poke all the way through. These dents will serve to hold the BBQ skewer as it props the flap open.
- Wrap a piece of tape around the skewer near its flat end. Do it in such a way that the tape crosses itself on the stick. The skewer and tape make the letter “T”. This will be the kickstand to prop open the flap.
- Use the sticky side of tape on the skewer to attach the skewer to the side of flap that has the dents in the lid. The pointy end of the skewer goes toward the hinge of the flap. The top half of the tape goes over the flap and the bottom half goes under the flap.
- Open the lid and load your oven with a few s’mores. Place graham crackers on top of the black construction paper, and top with a piece of chocolate and a marshmallow. (You will put the other graham cracker on top after it is done cooking.
- Before you close it up for cooking, tape a thermometer near the black paper inside the box in a spot that you can see through the plastic liner. This way you can keep track of the temperature inside your solar oven
- When your oven is assembled, take it outside in the sun and place it in a spot that will have full sun. Open the flap. Adjust the flap to reflect as much heat as possible into the oven. You’ll have to leave it for a while but check on it every so often so you can keep it pointed toward the sun. S'mores will be ready soon!
- Remove the S'mores from the oven and place the other graham cracker on top. Enjoy!
The solar oven cooker works on the principle of collecting heat energy from the sun and retaining it for cooking. To be most effective, be sure to cover as much of the interior of the box as possible (including the flap) with foil in order to direct as much heat as possible into the center of the pizza box. It’s important to adjust the flap and the position of the box to collect as much heat you can from the sun as it moves across the sky during the afternoon. The black construction paper is what does the cooking because black absorbs heat very well. As heat is retained, the air inside the oven also heats up and the plastic helps hold it inside the box. (Source: Steve Spengler Science)
We hope you’ve had fun with our favorite science projects! If you tried one yourself, let us know how it went. Post a picture or ask a question on our social media accounts. We’ve also got demonstration videos of each of these experiments that let you do them along with us.